Git Client
Aqua Data Studio includes a built-in client for Git, an Open Source distributed version control system that runs on Windows, Mac OS, Linux and Solaris. A rich set of Git features are available through a powerful graphical interface, that provides quick and easy access to versioned files. File operations common to all version control systems such as check in, mark for add, edit, delete, rename, revert are supported. Other major Git features in Aqua Data Studio include initialize repository, checkout, clone, add a remote server, push, pull, branch, tag, cherry pick, compare, history, refresh and repository browsing.
Aqua Data Studio Git1 Client Provides:
Clone a Git Repository
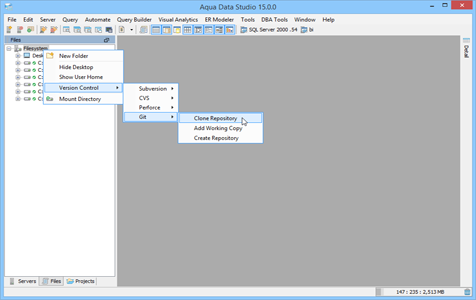
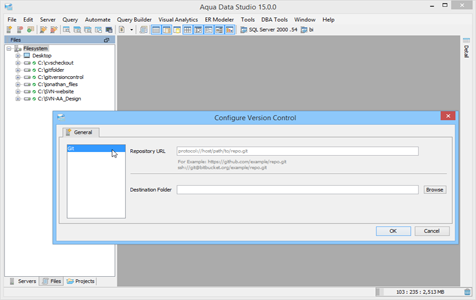
To clone a Git repository within the File Browser, right click and select Clone Repository, enter the Repository URL and a local checkout directory. This will download the remote Git repository to your local directory. If the repository is private you will be asked for your login credentials.
Git Client
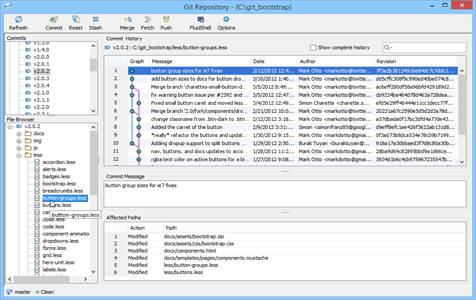
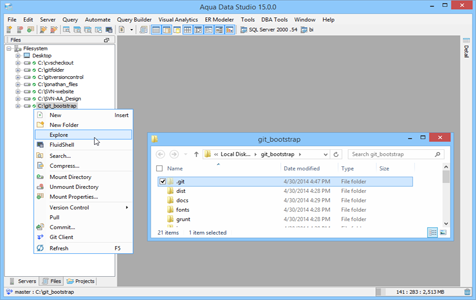
The Git Client offers an in-depth, explorable view of all the files in the local git repository (the .git directory). Its UI makes performing source control tasks like branching, tagging, fetching, merging and pushing much easier. To launch, right click within the Files Browser on an existing working directory and select Git Client. Our Git Client documentation offers an in-depth look at all of the Git Client’s features.
Stashing Changes
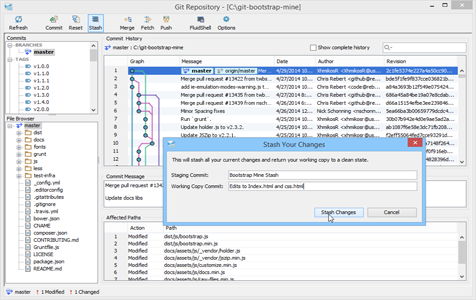
The Git client helps stash changes you’ve made. With the Stash button you can create a new Stash, then use the Stashes node in the Git Client to easily apply, delete and view any stash you have.
Working Concurrently
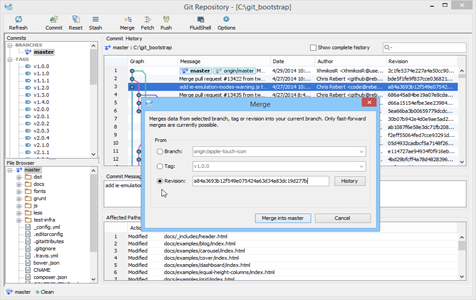
Aqua Data Studio’s Git client helps teams to work concurrently. Multiple users can work on the same file at the same time. With the Merge feature you can merge changes from another branch or tag or revision into your current branch.
Tracking Change History
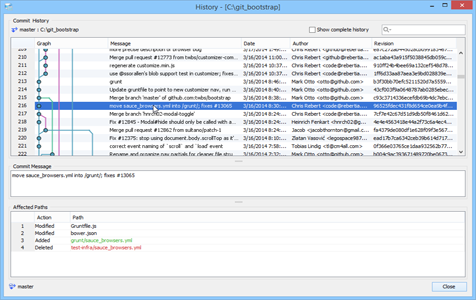
The Git client helps to track changes made in files between revisions. With the Version Control > Show History option, you can view commit revision id, author information, commit message and the date of commit. Affected Path shows the files which have been added, modified or deleted as part of this commit.
Comparing Files
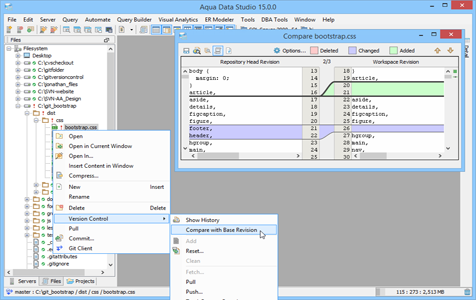
Using Version Control > Compare with Base Revision you can compare your local working copy with the base version. You can also compare changes between versions of a file by right clicking in the files browser, selecting Version Control > Show History then picking two versions to compare from the commit history.
Inline Difference Indicators
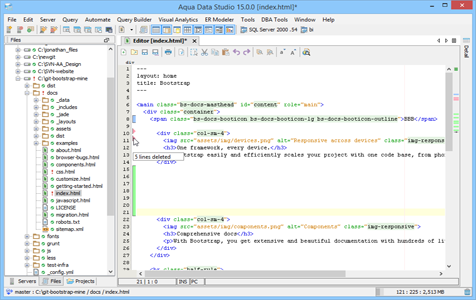
Files in the repository can be opened, edited and saved in the different editors available in Aqua Data Studio. The inline difference sidebar of each editor automatically displays the differences between the currently edited file and its corresponding file in the repository as new text is being typed. Inline diff indicators appear in all source editors – SQL, HTML, XML, Text, JavaScript and Java. This option may be enabled in File > Editor > General > Inline Diff Sidebar.
Branching and Tagging
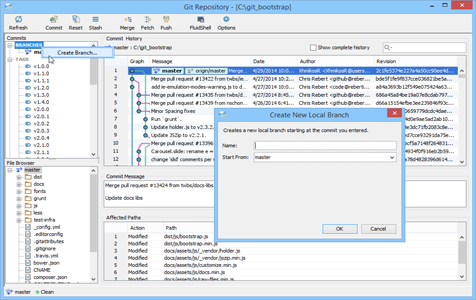
Branching is a method for managing changes between two or more sets of related files. With Aqua Data Studio’s Git Client you can create a new branch in the repository separate from your main development source. Branches can be created from existing branches or tags. Once the code in the newly created branch is stable, you can merge it back to the master branch. Using the Git Client you can also rename existing branches, delete branches and delete tags.
Git Repository
Git stores your files within a directory structure called a repository. A Git repository contains commit objects and a set of references to commit objects, called heads. The Git repository is stored in the same directory as the project itself in a subdirectory called .git.
Stage, Commit and Push from One UI
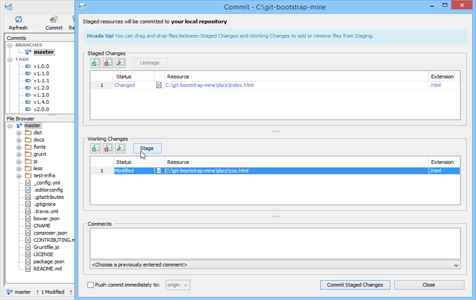
Once you have added, deleted or changed files, you can use the Commit feature in Aqua Data Studio’s Git Client to commit the changes from your working copy to the repository. Within the Commit dialog it is possible to Stage Changes and Unstage Changes and also Push the Commit immediately to Origin, or to an existing remote.
Git Checkout Remote Branch
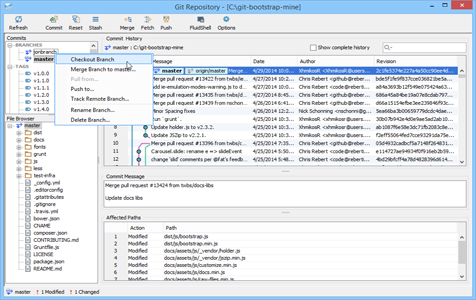
Aqua Data Studio’s Git client allows you to checkout an existing branch, be it local or remote. To switch to a local branch, use Version Control > Switch (Checkout) Branch. To checkout a remote branch, use the Git Client to right click on a remote branch and select Checkout Remote Branch.
Working with Multiple Remote Repositories
Aqua Data Studio’s Git client allows you to configure multiple remote repositories. To add a new remote repository, right click on the Remotes node of the Git Client and select Add Remote. Once you add a new remote repository you can Fetch from and Push to it. Using the Git Client, you can also view remote repository URL and credentials used.
Git Rebase
You can use Git Rebase to bring the current branch up to date with an existing branch, tag or revision. To rebase, right click on a repository and select Version Control > Rebase. The Rebase operation allows integrating upstream changes into your local repository. Rebase literally rewrites the commit history and is used for maintaining a linear project history.
Working with Commits
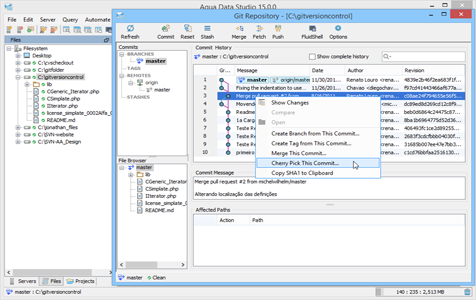
From the Git Client’s Commit History you can pick a commit and Create Branch or a Tag from it. It’s also possible to Merge or Cherry Pick from a selected commit.
Create a Git Repository
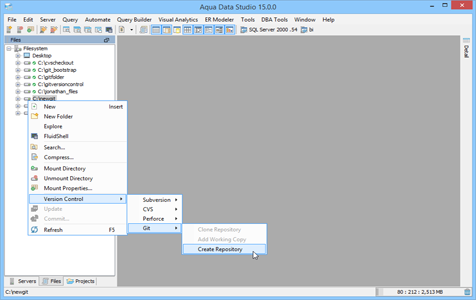
You can create a Git repository using Aqua Data Studio’s Git Client. Within the File Browser, right click and select the option, Create Git Repository. Aqua Data Studio creates an empty repository at the chosen folder. You can enable an option to Mount the repository once it is created.
Add an Existing Git Repository
You can add an existing Git repository to Aqua Data Studio by using the File Browser. Right click on the Filesystem icon and select Version Control > Git > Add Working Copy. From the resulting dialog, browse to find your existing Git Repository directory.
Git Push to Remote Repository
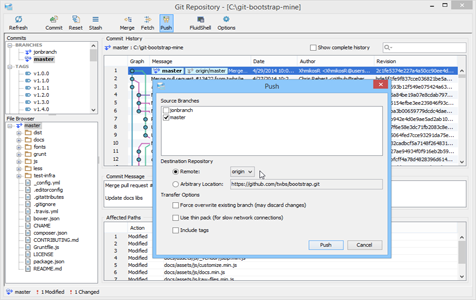
Once you have committed files to your local repository, you need to push your changes to the remote repository to share the files. To do this, right click on the repository, select Version Control > Push then select the Source Branch and the Destination Remote Repository. You can push to an Arbitrary Remote Location as well.
